
Drip Irrigation for Home Gardens: A Simple System You Can Install in a Day
How drip irrigation saves water, the parts you need, how to plan and lay out lines, and how to run a low-pressure system from a rain barrel.
On this page
Most garden watering is surprisingly wasteful. Sprinklers throw water into the air where it evaporates, onto paths and leaves where it does no good, and between plants where weeds grow. Drip irrigation delivers water slowly, right at the base of each plant, so almost all of it reaches the roots.
Studies and agricultural extension services commonly report that drip systems use substantially less water than sprinklers for the same crops, often 30 to 50 percent less. Plants also tend to grow better, because the soil stays evenly moist and the leaves stay dry, which reduces fungal diseases.
A basic home system is cheap and needs no special tools.
How it works
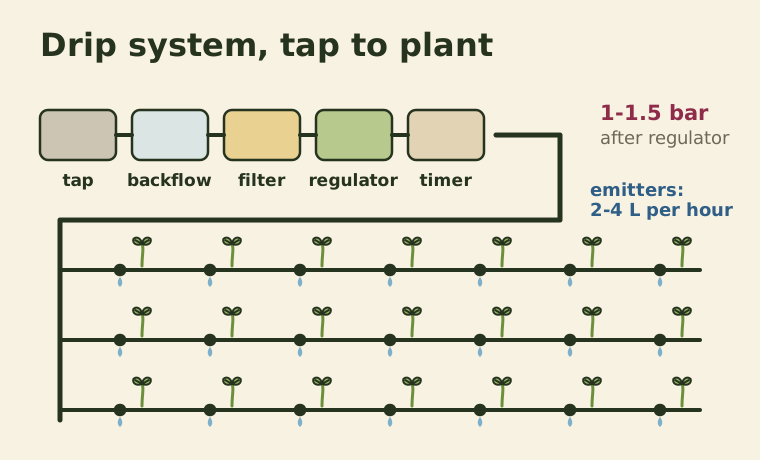
A drip system takes water from a tap or a raised barrel and runs it through a filter and a pressure regulator into flexible tubing. Small emitters along the tubing release water drop by drop, usually at a rate of 2 to 4 liters per hour each.
The parts
| Part | What it does |
|---|---|
| Backflow preventer | Stops garden water flowing back into your drinking water pipes. Required by many local codes. |
| Filter | Catches particles that would clog the tiny emitters. Essential with rainwater. |
| Pressure regulator | Reduces mains pressure (often 3–4 bar) to the 1–1.5 bar most drip parts are rated for. |
| Main line (16 mm tubing) | Carries water along the beds. |
| Emitters or dripline | Releases water at the plants. Dripline has emitters built in every 20–30 cm. |
| Micro tubing (4–6 mm) | Branches from the main line to individual pots or plants. |
| End caps and fittings | Close off lines and connect pieces. |
| Timer (optional) | Turns the system on and off automatically. |
Starter kits contain most of these parts and are a good way to begin.
Plan the layout
- Sketch your garden with beds, pots and the water source.
- Group plants by water needs. Vegetables and annual flowers need regular water. Established shrubs and Mediterranean herbs need much less. Ideally, each group gets its own line or zone.
- Choose emitter type. - Vegetable rows and closely planted beds: dripline with built-in emitters, laid in rows 30 to 40 centimeters apart. - Containers and widely spaced plants: individual emitters on micro tubing, one or two per plant. - Trees and large shrubs: several emitters in a ring around the drip line of the canopy.
- Keep runs reasonable. A single 16 millimeter line works best under about 60 to 100 meters in length, depending on the number of emitters. Long runs lose pressure at the far end.
Install the system
- At the tap: connect the backflow preventer, then the filter, then the pressure regulator. Add a timer here if you are using one.
- Lay the main line along the beds. Let it sit in the sun for an hour first so it softens and lies flat.
- Pin it in place with U-shaped stakes every meter or so.
- Punch holes for emitters or micro tubing with a hole punch tool, and push the fittings in firmly.
- Flush the line. Before closing the end, run water through for a minute to clear out any dirt.
- Fit the end cap and turn on the water. Walk the line and check every emitter.
- Cover with mulch. A layer of straw or wood chips over the line reduces evaporation even further and protects the tubing from sunlight.
Running drip from a rain barrel
Rain barrels have very low pressure. A barrel raised about 1 meter only gives roughly 0.1 bar. Standard drip emitters are designed for higher pressure, so you need to adapt the system:
- Raise the barrel as high as is safe and stable.
- Use gravity-fed or low-pressure dripline, designed for this purpose, or simply drill tiny holes in plain tubing.
- Skip the pressure regulator, but always keep the filter.
- Keep runs short and on level ground.
- Use a battery-powered timer rated for low pressure, or open the tap manually.
How long to water
There is no universal schedule, because it depends on your soil, climate, plants and emitter rate. A good way to calibrate:
- Run the system for 30 minutes.
- Wait an hour, then dig a small hole next to a plant.
- If the soil is moist 15 to 20 centimeters deep, the timing is about right for most vegetables. If not, run it longer.
As a starting point, many vegetable beds need 30 to 60 minutes, two to four times a week in warm weather. It is better to water deeply and less often than for a few minutes every day, which encourages shallow roots.
Containers dry out faster and may need short daily runs in summer. See our guide to growing vegetables in containers.
Maintenance
- Clean the filter every few weeks, more often with rainwater.
- Walk the lines regularly looking for leaks, puddles or dry plants.
- Flush the lines by opening the end caps once or twice a season.
- In cold climates, drain the system and bring the timer, filter and regulator indoors before frost.
- Clear clogged emitters by soaking them in vinegar, or replace them.
Is it worth it?
For a small vegetable garden or a balcony full of pots, a drip system pays back quickly in saved water and time, and plants usually look healthier for it. Paired with a rain barrel and mulch, it turns watering from a daily chore into something you check on once a week.
Keep reading
-
 Water & Energy
Rainwater Harvesting at Home: How to Set Up a Rain Barrel
How much water a roof collects, how to connect a barrel to a downspout, keep mosquitoes and algae out, and use rainwater safely in the garden.
-
 Small-Space Gardening
Build a Vertical Garden From Recycled Materials: Pallets, Bottles and Gutters
Three vertical garden builds using reclaimed materials, with what to grow in each, how to water them, and the safety checks to do first.
-
 Small-Space Gardening
Growing Vegetables in Containers: Pot Sizes, Soil Mix and Watering
How big each pot should be, how to mix a potting soil that doesn't compact, and a watering routine that keeps container crops healthy.