
How to Start Seeds Indoors: From Tray to Transplant
Containers, seed-starting mix, light, water and timing. A step-by-step guide to raising strong vegetable seedlings on a windowsill or under a lamp.
On this page
Starting seeds indoors gives you a head start on the season, a much wider choice of varieties than any garden center offers, and plants for a fraction of the price of nursery seedlings. It also means you can reuse yogurt pots, egg cartons and takeaway trays instead of buying plastic cell packs.
The process is simple once you understand what seedlings need: a light, sterile growing mix, steady moisture, warmth to germinate and plenty of light afterward. Most problems come from getting one of those wrong.
Which seeds to start indoors
Not every vegetable benefits from an indoor start. Some grow better sown straight into the ground.
| Start indoors | Sow directly outdoors |
|---|---|
| Tomatoes, peppers, eggplant | Carrots, radishes, beets, parsnips |
| Broccoli, cabbage, cauliflower, kale | Peas and beans |
| Lettuce and other salad greens (optional) | Corn |
| Onions and leeks from seed | Spinach and arugula (or indoors for an early crop) |
| Basil, parsley and many herbs | Squash and cucumbers (or indoors 3–4 weeks ahead) |
Root crops usually dislike being moved, and fast growers like beans and squash catch up quickly when sown outdoors.
Timing your sowing
The key date is your area's average last frost. Count back from it using the seed packet, which usually says something like "start indoors 6 to 8 weeks before last frost".
- Onions and leeks: 10 to 12 weeks before last frost.
- Peppers and eggplant: 8 to 10 weeks before.
- Tomatoes: 6 to 8 weeks before.
- Cabbage family: 4 to 6 weeks before. They can go out before the last frost.
- Squash and cucumbers: 3 to 4 weeks before.
In frost-free and tropical climates, timing follows the rainy and dry seasons instead. Start seeds a few weeks before the season that suits the crop.
Containers
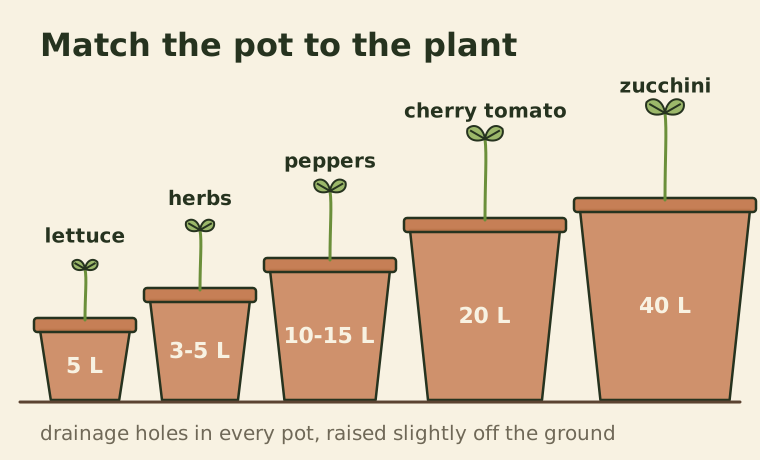
Any container with drainage holes works. Good reused options include yogurt pots, plastic cups, egg cartons (paper ones can be planted whole), takeaway trays and toilet paper tubes for deep-rooted crops like peas. Wash reused containers with hot soapy water first.
Smaller cells, 3 to 5 centimeters across, make better use of space for the first few weeks. Seedlings can then be moved into bigger pots as they grow.
Use a proper seed-starting mix
Garden soil is too heavy and can carry fungus, weed seeds and pests. Use a fine, light seed-starting mix, or make your own:
- 1 part coco coir or peat-free compost
- 1 part fine finished compost, sifted
- 1 part perlite or coarse sand
Moisten the mix before filling containers. It should hold together when squeezed without dripping.
Sowing
- Fill containers and firm the mix gently.
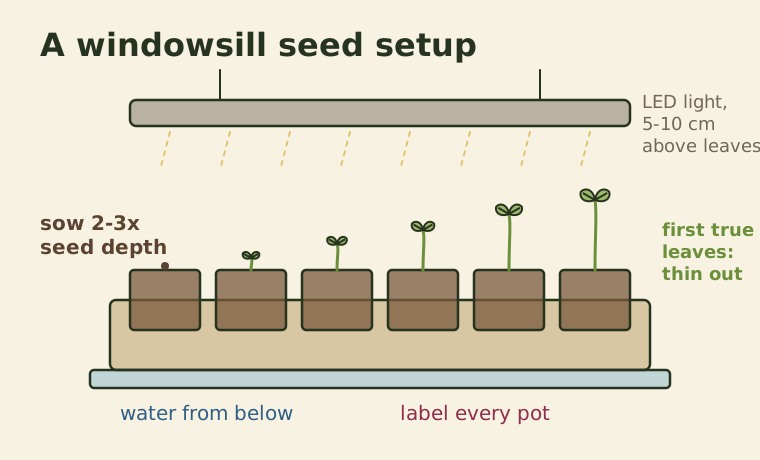
- Sow two or three seeds per cell. A common rule is to plant seeds at a depth of about two to three times their width. Tiny seeds like lettuce are pressed onto the surface and barely covered.
- Label every container with the variety and date. You will not remember which tomato is which.
- Cover with a clear lid, plastic bag or upturned tray to keep humidity high.
- Keep them warm. Most vegetables germinate best between 20 and 27 °C. The top of a refrigerator or near (not on) a radiator often works.
Remove the cover as soon as the first shoots appear.
Light: the most important factor
Once seedlings emerge, light becomes everything. A sunny south-facing window (north-facing in the Southern Hemisphere) can work in spring, but seedlings often stretch toward the glass and become tall, pale and weak.
A simple LED shop light or grow light makes a dramatic difference. Hang it 5 to 10 centimeters above the seedlings and raise it as they grow. Run it for 14 to 16 hours a day using a cheap outlet timer. Seedlings need darkness too, so do not leave lights on around the clock.
On a windowsill, turn containers a quarter turn every day so stems grow straight.
Watering
Water from below when possible. Set containers in a tray of water for 15 to 20 minutes, let the mix soak it up, then pour off the excess. This keeps the surface drier, which helps prevent damping off, a fungal disease that makes seedlings collapse at soil level.
Keep the mix evenly moist but never soggy. A small fan on low near the seedlings improves air circulation and also makes stems sturdier.
Thinning and potting up
When seedlings have their first set of true leaves (the second pair, which look like the adult plant's leaves), thin each cell to the strongest seedling. Snip the extras at soil level with scissors rather than pulling them, which disturbs the roots of the one you keep.
Move seedlings into larger pots when roots start to circle the container. Tomatoes can be buried deeper than they were, since they grow roots along the buried stem. Start a gentle feed at this stage, such as diluted compost tea every two weeks.
Hardening off and transplanting
Seedlings raised indoors need a week or two to adjust to wind, sun and temperature swings before they go into the garden.
- Days 1–2: Put them outside in shade for 1 to 2 hours.
- Days 3–5: Increase to half a day, with some morning sun.
- Days 6–8: Leave them out most of the day in full sun.
- Days 9–10: Leave them out overnight if temperatures allow.
Transplant on a cloudy day or in the evening. Water the seedlings well beforehand, dig a hole slightly larger than the root ball, firm the soil and water again.
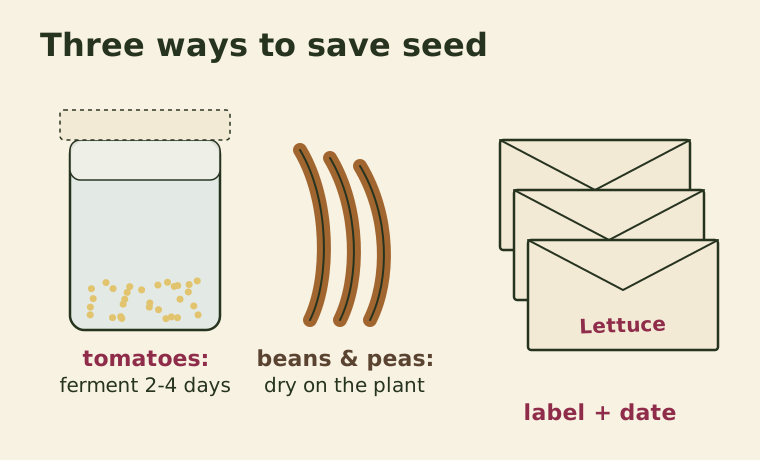
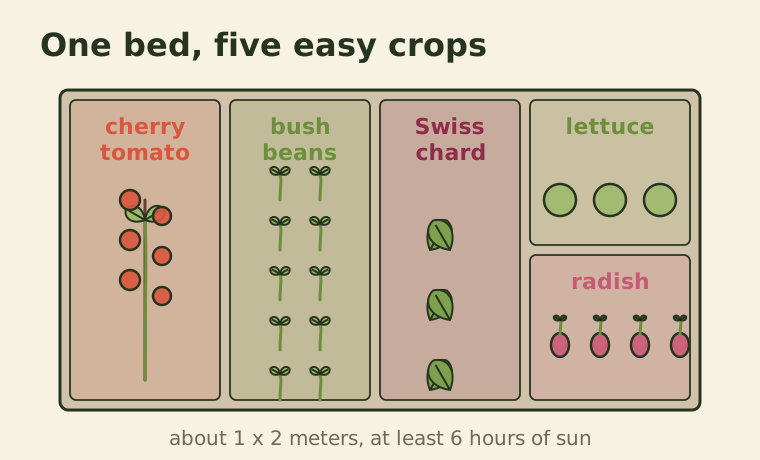
If you are new to growing food, start with a few forgiving crops from our list of the easiest vegetables for beginners. Once you are comfortable, try saving seed from your best plants with our seed saving guide, and you will not need to buy many packets again.
Keep reading
-
 Growing Food
How to Save Seeds From Your Garden: Tomatoes, Beans, Peppers and More
Which seeds are easy to save, why hybrids don't come true, and step-by-step methods for drying, fermenting and storing seed for next year.
-
 Growing Food
10 Easiest Vegetables to Grow for Beginners (and How Not to Kill Them)
Ten forgiving crops for a first vegetable garden, with spacing, time to harvest and the one mistake to avoid for each.
-
 Small-Space Gardening
Growing Vegetables in Containers: Pot Sizes, Soil Mix and Watering
How big each pot should be, how to mix a potting soil that doesn't compact, and a watering routine that keeps container crops healthy.