
The Green and Brown Compost Ratio, Explained Without the Math Headache
Why the 30:1 carbon to nitrogen number confuses people, how to translate it into buckets, and how to fix a pile that smells or won't heat up.
On this page
If you have read more than one composting guide, you have probably seen the number 30:1 and a table of carbon to nitrogen ratios that looks like a chemistry homework sheet. Then another guide tells you to use "equal parts greens and browns", and a third says three to one. They are all describing the same idea from different angles, and once you see how they connect, balancing a pile becomes simple.
What the 30:1 number actually means
The microbes that break down compost need carbon for energy and nitrogen to build their bodies. They work fastest when the material they are eating contains roughly 25 to 30 parts carbon for every 1 part nitrogen, measured by weight. That is the famous C:N ratio.
The confusing part is that no single ingredient is "pure carbon" or "pure nitrogen". Every material has its own ratio. Fresh grass is around 20:1, so it is already close to ideal. Dry leaves sit somewhere between 40:1 and 80:1. Cardboard can be 350:1 or higher. Food scraps are usually about 15:1 to 20:1.
So "green" and "brown" are shortcuts. Greens are materials below about 30:1, and browns are materials above it. When you mix them, the pile as a whole lands near the sweet spot.
Why volume rules and weight rules disagree
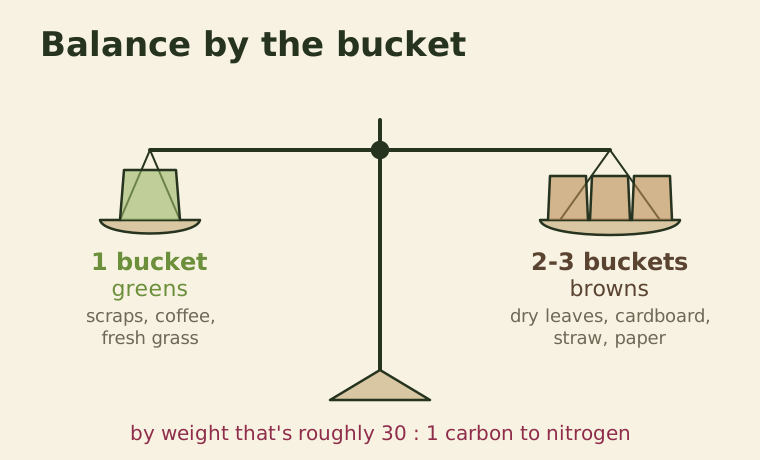
The 30:1 figure refers to weight. But at home we measure with buckets, which means volume. A bucket of dry leaves weighs far less than a bucket of wet vegetable peels, so by volume you need more browns to balance the same amount of greens.
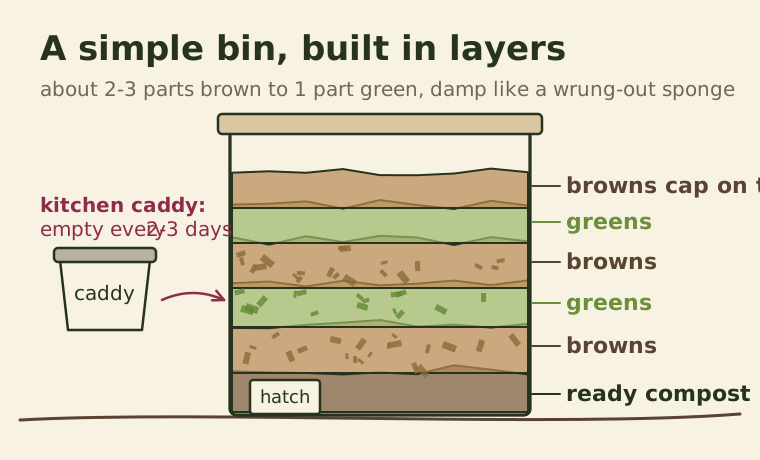
That is why practical guides land on two to three parts browns to one part greens, by volume. It is not a contradiction of 30:1, it is the same target expressed in a way you can actually use.
Common materials and where they fall
| Material | Green or brown | Rough C:N | Notes |
|---|---|---|---|
| Vegetable and fruit scraps | Green | 15–20:1 | Chop large pieces to speed them up |
| Coffee grounds | Green | about 20:1 | Paper filters can go in too |
| Fresh grass clippings | Green | about 20:1 | Mix in thin layers or they turn slimy |
| Tea leaves and bags | Green | about 20:1 | Check bags for plastic mesh |
| Chicken or rabbit manure | Green | 5–15:1 | Very strong, use with plenty of browns |
| Dry leaves | Brown | 40–80:1 | Shred them if you can |
| Straw | Brown | 50–100:1 | Great for adding air |
| Plain cardboard | Brown | 300:1 or more | Tear into small pieces, remove tape |
| Newspaper | Brown | 150–200:1 | Shred, don't add in thick wads |
| Wood chips and sawdust | Brown | 200–500:1 | Slow, best in small amounts |
These numbers vary with the exact material and source, so treat them as ranges rather than precise values.
Reading your pile: the four common problems
Rather than calculating, most experienced composters adjust by watching and smelling. Your pile will tell you what it needs.
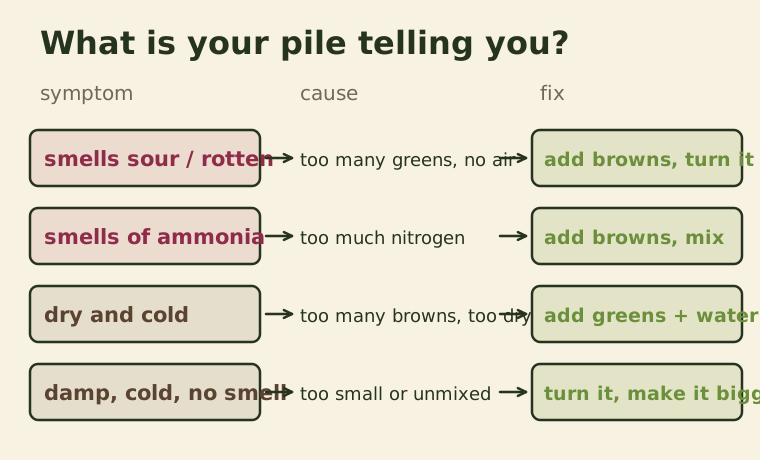
It smells sour or like rotten eggs. There are too many greens and not enough air. The wet, nitrogen-heavy material packs down, oxygen runs out, and anaerobic bacteria take over. Mix in a generous amount of dry browns and turn the pile to let air in.
It smells of ammonia. This is a nitrogen surplus, often from a big dump of grass clippings or manure. The extra nitrogen is escaping as gas. Add browns and mix.
It is dry, cold and nothing seems to change. There are too many browns, not enough water, or both. Add a bucket or two of fresh greens and water the pile until it feels like a wrung-out sponge.
It is damp but cold, with no smell. The balance may be fine but the pile is too small or not mixed. Turn it, and if possible, build it up to at least a cubic meter.
The squeeze test
Grab a handful from the middle of the pile and squeeze it.
- If water drips out, it is too wet. Add browns.
- If it holds together and a drop or two appears, it is perfect.
- If it crumbles apart and feels dusty, it is too dry. Add water and greens.
Practical habits that keep the balance right
The easiest way to stay balanced is to make browns available at the exact moment you add greens.
- Stockpile dry leaves in autumn. Several large bags or a simple wire enclosure will last most households through the year.
- Keep a box of torn cardboard next to the bin. Egg cartons, paper towel tubes and plain packaging all work.
- Every time you empty the kitchen caddy, add two or three times its volume in browns.
- When you mow, do not dump all the clippings at once. Spread them over several weeks, or let them dry on the lawn first, which turns them partly brown.
Does the ratio matter for worm bins and bokashi?
Worm bins follow the same logic but with a different emphasis. The bedding (shredded paper, cardboard, coco coir) is the brown portion, and it should make up most of the bin's volume. Worms struggle when scraps pile up faster than they can eat, so overfeeding greens causes the same sour smell as in a pile. Our worm bin guide covers feeding rates in detail.
Bokashi is different. It is a fermentation rather than a decomposition, and it works with greens alone, including cooked food. The balance comes later, when the fermented material is buried or added to a regular pile with browns.
The short version
Use about two to three buckets of browns for every bucket of greens. Keep the pile as damp as a wrung-out sponge. If it smells, add browns and air. If it sits still, add water and greens. That covers most of what the 30:1 tables are trying to say, without the arithmetic.
Keep reading
-
 Zero Waste Home
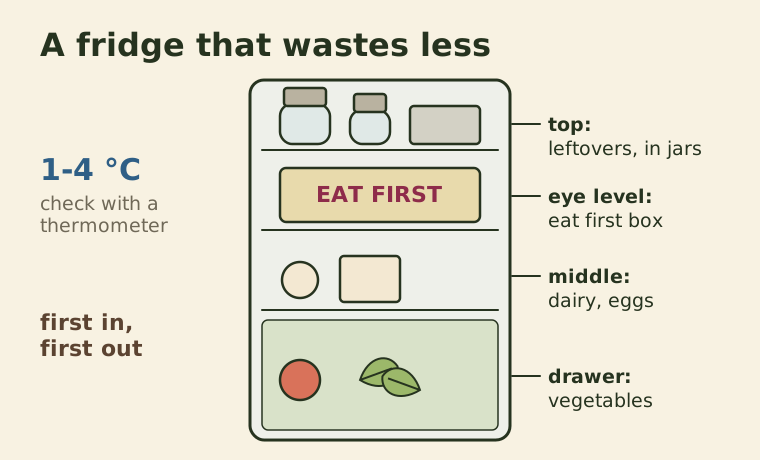
How to Reduce Food Waste at Home: Plan, Store, Use Up
Where household food waste comes from, how to shop and store to prevent it, what date labels really mean, and how to use up scraps before composting.
-
 Composting
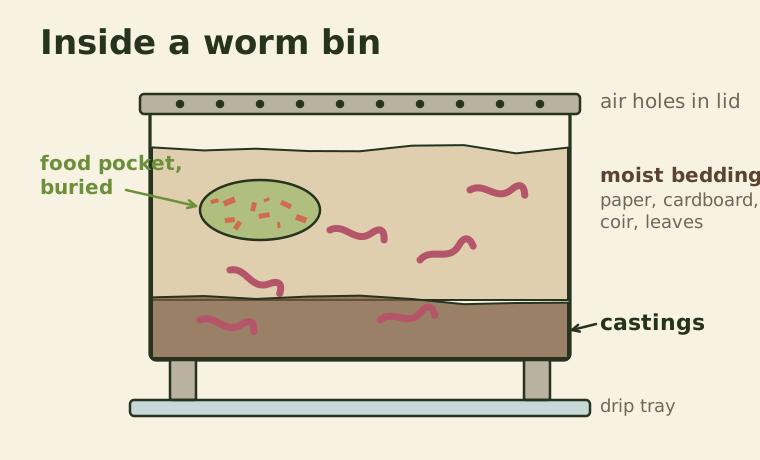
Vermicomposting for Beginners: How to Set Up and Run a Worm Bin
A worm bin turns kitchen scraps into rich castings indoors or on a balcony. Here's how to build one, feed it, and keep it from smelling.
-
 Composting
How to Start Composting at Home: A Beginner's Setup That Actually Works
Choose a bin, find the right spot, learn the two ingredients that matter, and get your first finished compost in three to six months.